How to Tint Car Windows: Step by Step
Car window tint is a thin film that goes on the inside of the glass. It’s applied wet, with a soapy slip solution that lets you slide it into position before you squeegee the water out. Every window goes through the same stages: clean, cut a pattern, shrink it if the glass is curved, install, squeegee, cure.
Below, each hands-on step comes with the free lesson in which our instructor Alex demonstrates it. Alex has tinted cars professionally since 2012, and this is the sequence he teaches. All eight lessons are also on our free window tinting videos page.
What you need before you start
- Window film: a roll wide enough for the largest window, plus spare. A piece with dust or a crease under it can’t be saved and has to be cut again.
- Slip solution: water with a little baby shampoo, in a spray bottle.
- Squeegees: a rubber squeegee for the inside of the glass and smaller windows, a larger one for big windows, and contour squeegees for tight spots such as quarter windows.
- Hard card: for locking the film in place and for heat shrinking.
- Foot tool: for tucking film behind the door panel on a top-loading install.
- Knife and blades: a stainless steel tinting knife that won’t scratch the glass, and plenty of fresh blades. Ordinary carbon steel blades, like those in a standard snap-off utility knife, can scratch glass, especially on the outside where you cut patterns. Change to a fresh blade whenever it starts to drag.
- Scraper, heat gun and tape measure: for cleaning the glass, shaping film to curves and sizing each piece.
- Lint-free towels and paper towel: for drying panels and catching water at the edges.
- A clean, enclosed space: a garage with the door shut beats a driveway, because wind carries dust onto wet film.
Our window tinting tools and equipment guide covers each item in more detail.
In this free lesson, Alex goes through the whole tool kit, explains what each tool is for and points out the cheaper look-alikes to avoid.
Choosing your film
Car window film comes in four main types: dyed, metallised, carbon and ceramic. Dyed film darkens the glass with dye. It usually rejects less heat than ceramic film, and lower-quality dyed film can fade or discolour over time. Metallised film uses metal particles to reflect heat and often looks shinier. Carbon film has a non-reflective finish and holds its appearance better than dyed film. Ceramic film is metal-free, so it avoids the signal concerns of metal-based films, and rejects more heat, but may cost more. Ask your supplier how well a film heat shrinks before you buy a roll. Our guide to window tint film types compares them in detail.
Check the legal limit before you cut anything
Every Australian state and territory sets a minimum visible light transmission, or VLT, for car windows: the share of light that passes through the glass and the film together. For the front side windows, beside the driver, the rule is the same everywhere. At least 35% of light must get through.
The rules for the windows behind the driver differ from state to state, and in some states they depend on the car having a mirror on each side. The windscreen has its own rules again. Check your state in our window tint laws by state guide before you order film.
Glass prep: why cleaning makes or breaks the job
Dust trapped under the film is the fault customers notice and complain about.
Old, faded or bubbling tint has to come off first. Our guide on how to remove window tint covers the film and the glue it leaves behind.
Alex cleans every door window in three steps:
- Scrape. Spray the glass with soapy water and run the scraper at an angle across the whole window. It lifts tiny particles that a cloth misses and the eye can’t see.
- Push the dirt down. Use the foot tool to push the water and loosened dirt to the bottom of the glass.
- Wipe the panel. Run paper towel down the inside of the door panel.
Give the embossed lettering on car glass extra scrubbing. Dust left in those letters shows as a silvery outline that won’t go away once the film is on. Clean the outside of the window as well, because that’s where you’ll cut the pattern.
This free lesson shows the three-step cleaning process on a car door window, including the extra work the embossed lettering needs.
Cut a pattern on the outside of the glass
Film is cut to shape on the outside of the window, then installed on the inside. Spray the outside of the glass, lay the film on it with the liner facing you, and squeegee it lightly so it stays put while you cut.
On a door window, Alex makes the pattern in four cuts. He starts on the side the car is facing, slides the film into position before locking it, makes the top cut with the window lowered, and makes the bottom cut with the knife resting on the rubber gasket so the blade doesn’t damage it.
Then he rounds every corner with a ruler. Sharp corners are where film starts to peel. A pattern cut short leaves a strip of bare glass along the edge, called a light gap.
In this lesson Alex patterns a regular front door window in four cuts, rounds the corners and installs the film using the top-loading method.
Heat shrink film on curved glass
Flat film won’t sit flat on curved glass. On a curved window the excess lifts into ridges called fingers, which stop the film sitting inside the window. Heat shrinking takes them out while the film is still on the outside of the glass. Curved rear windows need it, and so do curved front door windows, which many European models have.
- Anchor the film. Lock it to the glass in an H shape with a hard card so it can’t move.
- Stand the fingers up. Lift each one so the heat can reach it.
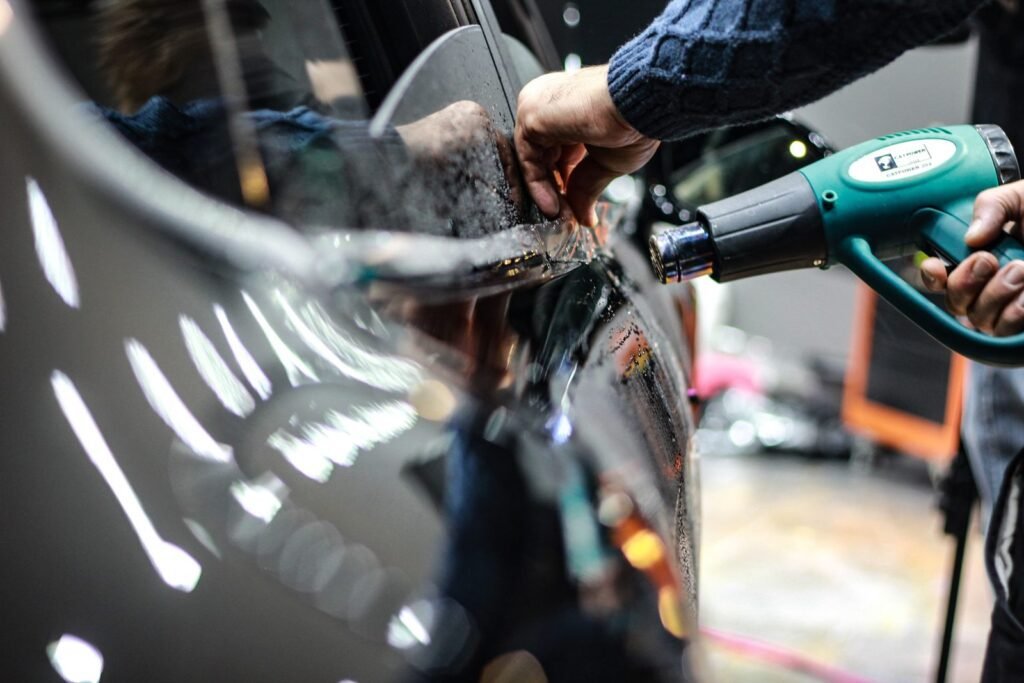
- Shrink one section at a time, starting from the top. Pass the heat gun over each finger quickly, just until the film reacts, then work it down with the hard card until it lies against the glass. Keep the gun moving, and never hold it on one spot for more than a few seconds.
- Repeat until the film takes the shape of the glass. Then trim it and round the corners, ready to install.
Practise on a scrap piece before you shrink a full rear window.
In this first part of a two-part lesson on a curved front door, Alex shows the order of the cuts, locks the film with a hard card and shrinks the fingers until the film takes the shape of the glass.
Top-loading vs bottom-loading door glass
Door glass slides down into the door past a rubber gasket and the door panel. The film has to run down behind that line so the bottom of the window is covered.
Bottom loading is the traditional way to tint a back door window. You free the door panel from the glass, clean, peel the liner and wet the film, then feed it in from the bottom without touching the panels, centre it and lock it with the squeegee.
Top loading installs the film from the top. You position it on the glass, then use the foot tool to open the gasket and slide the bottom edge down behind the door panel.
Both work, so learn both. In this lesson Alex frees the door panel, cleans the glass and feeds the film in from the bottom while resting it on his arms.
Installing the film, window by window
Every install uses the same moves. Clean the inside of the glass again, peel the liner and spray both the adhesive side and the glass generously with slip solution. Handle the film with wet fingers so you don’t leave prints in the adhesive. Place it, lock it in the middle, then squeegee the water out to the sides.
Front doors
Install the patterned film from the top with the foot tool, squeegee the water out to the sides, then check the window from outside the car, as Alex does at the end of the lesson. A curved front door gets the same install once the film has been heat shrunk.
Rear doors
Back door windows follow the same steps; Alex bottom-loads his in the lesson above. Centre the film with a hairline gap at the edges, lock it with the squeegee and push the water out to the sides.
Rear window: one piece or strips
The rear window is the trickiest part of a car, because the glass is curved and the film is flat.
One piece is the method Alex teaches. He measures the glass, releases the tension around the rear wiper, locks the film in an H shape and heat shrinks the fingers one section at a time from the top. He then trims the film, installs it from the inside and squeegees the water out sideways, so none is trapped along the demister lines.
Strips are the alternative: several horizontal pieces, with each join cut along a demister line. It avoids heat shrinking, but every seam has to sit exactly on a line, and a one-piece window has no seams at all. Each join is cut on the inside of the glass, right on a demister line, so a careless stroke can damage the line.
Demister lines are fragile whichever method you use. When you clean a rear window, never run a blade or scraper across them: one careless scrape can damage them permanently.
If the car has a third brake light mounted inside the rear window, don’t run film between the light and the glass. South Australia’s regulator says tint there reduces the light’s visibility and makes it non-compliant.
This full tutorial covers a hatchback rear window, with a method that also works on SUVs and wagons.
Quarter windows
Most cars have quarter windows. The shapes vary, but the way you pattern and install them stays the same. Place the film with the liner facing you, make the first cut on the side the car is facing, work the extra film into the corner so there’s no gap at the top, and finish with a cut along the bottom. Round every edge, and use a contour squeegee in the tight spots.
This lesson shows a regular quarter window from pattern to install, including how Alex cleans the small glass and locks the film in the middle.
Squeegee sequence and tucking the edges
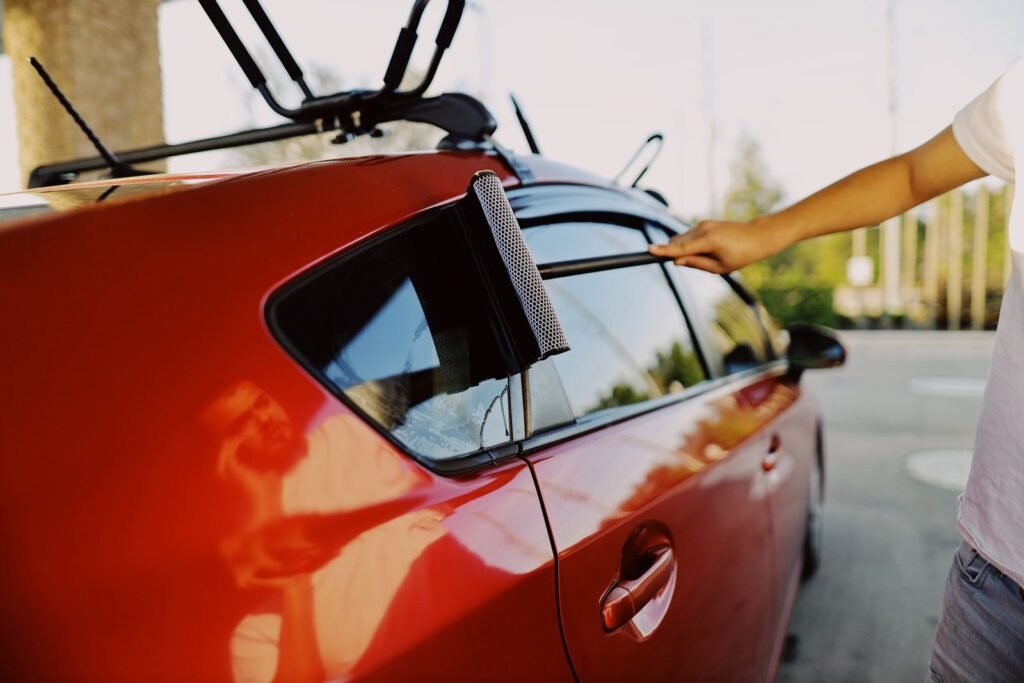
Lock first, then work outwards. Squeegee from the centre to anchor the film so it can’t slide, then push the water out to the sides. Keep the film and the glass wet until the film is exactly where you want it.
Work the water out at the edges last. On a top-loaded door, tuck the bottom edge behind the panel by opening the gasket with the foot tool. On a quarter window, work the extra film into the corners.
The squeegee pattern is easiest to learn on flat glass, with no curves to fight. In this lesson Alex tints a home window: he locks the film from the centre, trims the edges freehand using a finger as a guide and pushes the water out to the sides. A house window is a good place to practise before you start on a car.
Curing: what’s normal after you finish
New tint doesn’t look finished on day one. Water is still left under the film after you squeegee, and it dries out over the following days and weeks. While it does, a slight haze or small water pockets are normal. 3M’s care guide for its car window films says the glass may look hazy for the first week, and allows up to two weeks, with at least a week of sun on the car, for water bubbles to dry out.
Keep the windows wound up for the first few days. Winding a window down too soon can make the film peel at the edge. Check the film manufacturer’s instructions for the exact time, and for when you can clean the inside of the glass.
Common faults and how to fix them
Contamination
Dirt, hair and fibres trapped under the film show up as specks. They come from glass that wasn’t fully clean or dust that settled on it after cleaning. Once the film is on, a trapped speck stays, so the fix is a new piece.
Creases
A crease is a fold in the film, and 3M lists creases among installation faults. The fix is prevention: handle large wet pieces carefully, which is why Alex rests the film on his arms when he feeds it into a door.
Light gaps
A light gap is a visible strip of bare glass between the film’s edge and the frame, from a pattern cut short or film that slid during the install. A hairline gap at the edge is intended. A wide strip of light is not. Cut patterns carefully and work the film into the corners.
Peeling edges
Edges lift where corners were left sharp, or where a window was wound down before the film cured. Round every corner and keep the windows up for the first few days.
Bubbles
There are three kinds. Water pockets shrink as the film cures, so give them time; 3M’s car film guide says to get help if they’re still visible after three weeks. A bubble around a speck of dirt is contamination, and it won’t dry out. An air bubble is an installation fault, as 3M classes it alongside creases, so work the squeegee over every part of the film.
If you’d rather learn every window in order, from tools to quarter windows, our online course works through each window of a car, step by step. You can see the full lesson list before you decide.
Want to learn to tint properly?
Our online course is $129.95 AUD, with lifetime access and a certificate after a video assessment. Every window of a car, step by step, taught by our instructor Alex.
Enrol now – $129.95 AUDOne payment · Lifetime access · 7-day refund